
I see far too often, many people paying monthly fees to have UniFi controllers hosted for them. There are entire businesses centered around hosting controllers for Small/Medium sized businesses and that just seems asinine to myself as most of those businesses have a server or an unused desktop they can host their own controller on themselves, often for much much less per month than a cloud instance. These cloud instances are simply spinning up a VM or partitioning an existing host and user rules to service your company.
Some people may want to be able to access their controller from anywhere, this is easily solvable with properly routing your controller out to the public and maintaining good security practices to prevent unwanted access or by utilizing a VPN into your network and connecting to your controller that way.
Minimum Requirements
- Spare Desktop or Server VM
- Internet Access
- Meet the base requirements to run a Linux distro of your choosing (I use Debian for my examples)
- 30-45 minutes for configuration
Configuration
For configuration, I prefer to use an LTS version of whatever Linux distribution I choose, simply for updates moving forward and not having to migrate to a new version as often.
I run my controllers in a VM via VMWare ESX but you can run this on Hyper-V/ProxMox/etc. or on baremetal with a device as simple as a Raspberry Pi/Dell Micro/Lenovo ThinkCentre. 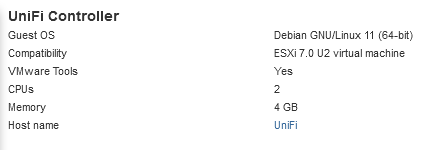
If running in a virtual environment, I prefer to assign a minimum of 2 cores and 4GB of memory and ~25GB of storage space.
Choose Your Distro
For easy access, I've included a list of links to popular Linux distributions below.
Ubuntu 20.04.3 LTS
Debian 11
CentOS 7.9.2009
If installing to baremetal, you'll want to make a bootable USB/CD, I prefer Rufus but you can use whatever you'd like as long as it will create a Linux Bootable USB/CD.
Install Your Distro
As all installations will vary, this guide assumes you know how to create a VM or configure an OS on baremetal.
One small note, at the end of installation, I usually elect not to install a Desktop Environment as I'm comfortable in Linux CLI and the server itself has a singular purpose and is not meant for general use.
You will want to also set a static IP address for this new host, so make sure you've got an address available and head over to your /etc/network/interfaces file with your favorite text editor and configure a static address for the host. 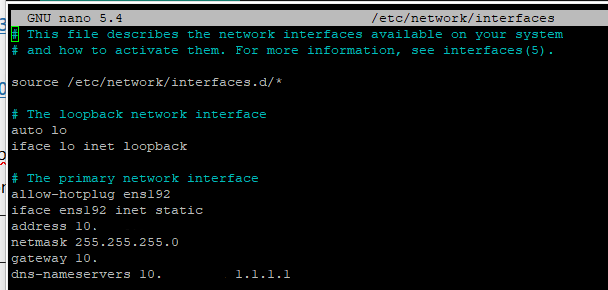
Install Your UniFi Controller
Depending which version of controller you'd like to run, I typically prefer most up to date or one version previous, you can find an installation script on this extremely useful UI community post here. You'll want to save this link as it can be used for upgrades in the future.
The above script(s) really take care of all the messy parts of installing and configuring a UniFi controller on your network, opens the right firewall ports on the host, sets up MongoDB, etc.
Once the installation is completed, go to https://address-of-controller:8443 and configure your admin access. From this point you will want to configure your network as you see fit, create SSIDs, configure VLANs, etc. You can also export a copy of your existing controller and import that configuration during set up to make sure things are not missed.
Adopt Existing Devices
If you've migrated your configurations, you will still need to connect to each of your UniFi devices and update the inform address, basically telling the device which controller to poll for updates and connectivity information for client devices. If you aren't sure what addresses your UniFi devices are using, I recommend an IP scanner like Advanced IP Scanner.
To do this, you will need to SSH into your existing UniFi devices and run the following command
set-inform http://FQDN:8080/inform
Make sure to replace "FQDN:8080" with your controllers IP address or FQDN but maintain the 8080 port assignment at the end as this is the communication port for UniFi devices/controllers. If done successfully, you should see these devices either connect or be ready for adoption in your UniFi controller.
External Access
External access will be handled differently everywhere as well. If you're a small/medium business, you probably have some type of hardware firewall that would allow a VPN connection and you can configure this to your liking for remote access. You can also put routing rules in place to make your UniFi controller publicly accessible, though I don't recommend this approach.
If you are a single person trying to manage multiple devices at remote locations or just want access while away, you can configure a free service like ZeroTier which offers installation options for Linux, Windows, Mac, iOS and Android. Once this is installed and setup on your server and a remote device, you can connect as if you're on the LAN and make changes as you need to.
I hope you've found this write up helpful. If I've missed anything or anything feels unclear, please drop a comment and let me know.
#Jordan